DIY Autumn Cinnamon-Vanilla Soy Candle♥

soycandleedited

Autumn is here in the Pacific North West!

dcc4e1c6296714efbc69c64673625b32

The leaves are falling (and I should be raking them), The pumpkins are ready for carving (but I am lazy)…

…and every single edible thing on earth is injected with pumpkin and cinnamon.

giphy-3

I saw Pumpkin Spice Hummus earlier this week, people.

Seriously, we have to stop this madness.

tumblr_lu4xw5yder1qljqdfo1_500

This candle although not edible, it will certainly get you in the mood to embrace the new season!

20160928_125259

You will need:

Empty glass vessel (14oz) (I used an old B&BW Candle)

3 Cups Soy Flakes

Glass Measuring Cup

3 Cotton Wicks

Cinnamon Leaf Essential Oil

Vanilla Essential Oil

Cinnamon 

Hot Glue Gun+ Glue

Toothpick

Scissors

Embellishments of choice  

Start by cleaning your glass vessel thoroughly and then set aside.

Measure out 3 cups of your wax flakes and either set over double boiler to melt or put in microwave for 6 minuets, (or until completely melted).

It will condense down considerably to almost half the volume it was before it was melted. Once poured in jar, it will leave 1 inch of head space.

While wax is melting, take your glass vessel and start hot gluing the wicks to the bottom of the jar. I find it helps to have a pencil with an eraser on hand to push the wicks securely into the glass.

20160927_142756

Once the wax is melted, slowly pour it into the center of the glass vessel.

Add 10 drops of each essential oil, and stir gently with toothpick to disperse the oils.

20160928_125446

Once this is done, put your vessel onto a plate and either place it in the fridge (if you want it to set quicker), or an undisturbed, cool part of the house.

I put mine in the fridge, and after about an hour it was 75% of the way set. Once it is at this stage, it is time to adorn the top with little sprinkles of cinnamon!

You must wait to do this step when the candle is almost solid, but still slightly a liquid near the top to keep the cinnamon from sinking to the bottom.

20160927_153008

I also had a bag of cinnamon sticks on hand, so I used a couple pieces of the bark slivers to add some extra texture.

Let the wax set completely, then cut the wicks down to 1/2 and inch tall.

There you have it! Burn this lovely candle at your leisure this Autumn or to give as a sweet gift to a loved one!

 Happy Autumn!

♥Shelby
Practically Free Upcycled Organizers♥

20140126_134743-2Crafting? For free?! In under 30min? When and where do we start!? 
Just grab a cardboard box (or whatever kind you have around the house), some hot glue, leftover fabric, pretty ribbon or embellishments, a large needle or medium nail, and scissors! Together, we will create these cute storage boxes! 
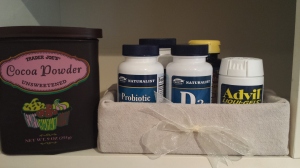
This Sunday morning, while making some delicious blueberry buttermilk pancakes (which you can find here), I noticed that my baking cupboard was a disaster less than organized. I had been planning on organizing it for some time, but with a new job promotion, (shameless self promotion, did you see that?!) I figured today was as good a day as any to get to work! 
Now, first find a medium sized box. Shoe box, Amazon box, anything you want! 
After I cut off the cardboard wings I cut the box down a few inches in height until I found something that would work for me. 
Depending on how big your box is (my “large” one was only 10 inches long), the fabric should be able to cover the four parts of the outside of the box plus the underside. 
Grab your fabric, and you should be able to eyeball how much you will need. For a box that is 10×7 I used a piece of scrap canvas that was no bigger than 2ftx2ft. Plenty left over, but use a little more fabric than you think you’ll need just to be on the safe side. 
Lay the box in the middle of the fabric. With the box’s long side facing you (in my case, the 10 inch side), hot glue the fabric to the front of box, leave and inch of fabric above the lip of the 10″ side and fold it over to the inside of the box. Repeat on other side. Now for the 7″ sides, this is the way I do it, because its easy and I like the way it looks! It’s like wrapping a present. 

20140126_123714Make a triangle with the fabric, and fold it over the lip of the cardboard box. Glue the point of the triangle, and secure it on the inside of the box. It should look like this:
20140126_130312-1The inside part is easy. Cut strips of fabric that fit onto each side of the box and glue them accordingly. So in my case I needed two 6″ strips of fabric and two 10″ strips of fabric that were about 2″ high. The point is to eliminate the unsightly cardboard. Then, cut out a square/rectangle of fabric that will fit perfectly on the inside bottom of the box and place it inside. Glue the corners so it doesn’t slide!
The embellishment part is totally up to you! Get creative! These are going in my pantry and I just wanted to do some cute bows. I poked holes in the box and fabric using a large needle, you can also use a nail.
20140126_131249Thread your ribbon through using the needle and tie your cute bow! Organize your items as you see fit!

20140126_123807

20140126_134743-2
Easy, and practically free! Hooray!

clap!
♥Shelby